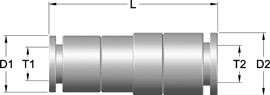
Most leaks in an industrial tubing system start at a joint, not along the tube itself. A connection which looked tight on installation day can begin to weep after weeks of vibration, pressure cycles and temperature swings. Stainless steel push-to-connect fittings address this point with a sealing and gripping design built for repeatable, tool-free assembly.
Choosing stainless steel push-to-connect fittings which match the tube size, pressure and temperature of the line gives maintenance teams leak-tight joints that install quickly and hold their seal over long service periods. This post explains where tubing leaks usually begin, how the O-ring and collet work together, what to check before installation, and how correct selection supports planned maintenance.
Where Leaks Begin in Industrial Tubing Systems
Loose Connections and Worn Seals: Loose connections and worn or nicked seals are the most common sources of leakage at a tubing joint. A tube which was not pushed fully home sits on the edge of the O-ring instead of across it, and vibration slowly works it outward. A seal scored during assembly leaves a small path for air, water or hydraulic fluid to escape.
Tube Size and Installation Habits: Tubing with the wrong outside diameter or a soft wall can let the joint loosen under pressure, even when the fitting itself is in good condition. In everyday plant maintenance, technicians routinely trace recurring weeps to tube ends cut at an angle with pliers or pushed in without a depth mark. The fitting is rarely the cause.
The O-Ring Seals while the Collet Holds the Tube
The O-Ring as the Sealing Element: The O-ring inside a push-to-connect fitting creates the seal by compressing against the outer surface of the tube as it passes through. System pressure then pushes the elastomer harder against the tube wall, so the seal tightens as pressure rises. The material of the O-ring, often nitrile or fluorocarbon, decides which fluids and temperatures the joint can handle.
The Collet as the Retaining Element: The gripping collet holds compatible tubing in position by biting lightly into the tube surface with a ring of stainless steel teeth. Any pull on the tube draws the collet tighter, which keeps the tube from backing out. Pressing the release ring frees the teeth, so the tube can be removed and reinserted without tools or new parts.
Tube Dimensions, End Preparation and Rated Limits
Correct Outside Diameter and Clean Tube Ends: A push-to-connect joint depends on a tube with the exact outside diameter and a wall firm enough for the collet to grip. The tube end should be cut square with a proper tube cutter, free of burrs and scratches, and wiped clean. Marking the insertion depth on the tube confirms it reached the internal stop.
Pressure and Temperature Ratings: Every fitting carries a maximum working pressure and temperature range, and both should sit above the real conditions of the line. Heat changes the picture, because thermal expansion and softening of plastic tubing reduce grip at higher temperatures. Pressure ratings often fall as temperature climbs, so checking the derating chart for the combined condition gives the safer choice.
Comparing Push-to-Connect, Compression and Threaded Fittings
Compression and Threaded Alternatives: Compression fittings handle very high pressures and metal tubing well, but they need wrenches, correct ferrule seating and careful torque on every joint. Threaded fittings with sealant suit permanent connections, though they take longer to install and can loosen if the sealant is applied unevenly. Both options make later changes to the line slower.
Where Push-to-Connect Is the Practical Choice: For pneumatic lines, cooling circuits and process tubing within their rated limits, stainless steel push-to-connect fittings offer fast assembly, easy reconfiguration and corrosion resistance in washdown or chemical environments. The trade-off is a lower pressure ceiling than compression fittings and a higher unit cost than brass or plastic versions of the same size.
Correct Selection Keeps Maintenance on Schedule
Following the Manufacturer’s Instructions: Manufacturer installation instructions specify the tube materials, insertion depth, minimum bend radius and release procedure for each fitting series. Following them on every joint gives each connection the same seal and grip the fitting was tested for. Keeping a printed guide and the correct tube cutter at each work area makes that consistency much easier.
What Happens When Small Leaks Are Left in Place: A slow leak at a tubing joint usually grows as the seal wears and the tube shifts with each pressure cycle. Lost air raises compressor run time, and lost fluid adds cleanup and top-up work. Folding fitting checks into a preventive maintenance schedule turns an unplanned stoppage into a short task during planned downtime.
Selection and Installation Points Worth Keeping
A Practical Checklist: A short checklist helps engineering and maintenance teams get the full value from stainless steel push-to-connect fittings across every line in the plant. The points below cover selection and installation, and each one supports a leak-tight joint which stays reliable through regular pressure cycles and routine reconfiguration of the tubing layout.
- Match the fitting size to the outside diameter of the tube, not its inside diameter.
- Cut tube ends square with a proper cutter and remove any burrs.
- Mark the insertion depth and confirm the tube reaches the internal stop.
- Check pressure and temperature ratings against the actual operating conditions.
Leak-Tight Connections for Every Production Line
Correctly selected and installed stainless steel push-to-connect fittings keep tubing joints sealed, reduce compressed-air and fluid losses, and make line changes quicker. Every week a weeping joint stays in service adds to energy use and maintenance hours. Get in touch today to discuss the fittings and components your industrial tubing systems need.
